Incredible Vegan Potato Curry Recipe (Instant Pot)
Share and Spread Healthy Recipes!
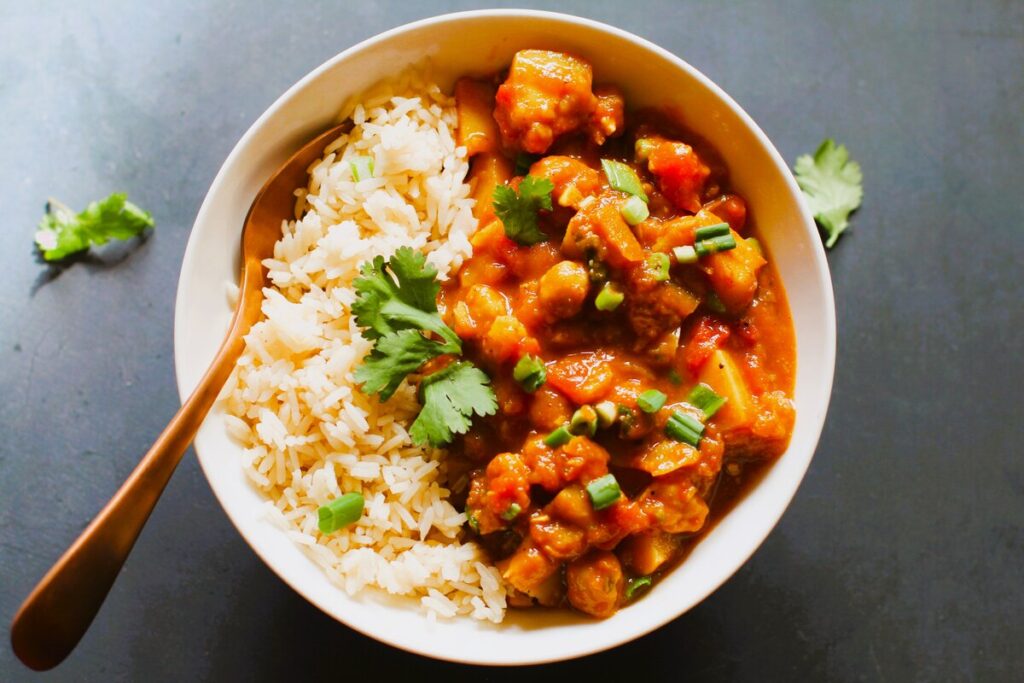
This simple vegan potato curry recipe combines the earthiness of hearty potatoes with the nuttiness of chickpeas, all simmered in a spiced tomato-based sauce. This chickpea curry, also known as aloo chana curry is delicious served over rice and with naan bread.

Before I lost 125 pounds I loved eating Indian food, especially samosas and pakoras, and lots of naan bread.
I still love eating Indian dishes, but now that I enjoy healthy eating and a lower-calorie diet I created this easy vegan potato curry so I can control the amount of oil or ghee and rice and I’m not eating endless supplies of naan bread.
Reader Review – Incredible Vegan Potato Curry Recipe (Instant Pot)
This curry is such a delicious meal! It’s my new favorite! – Lee
Snack Smart!
Grab your FREE Plant-Based Snacks, Smoothies, & Desserts mini-cookbook now!
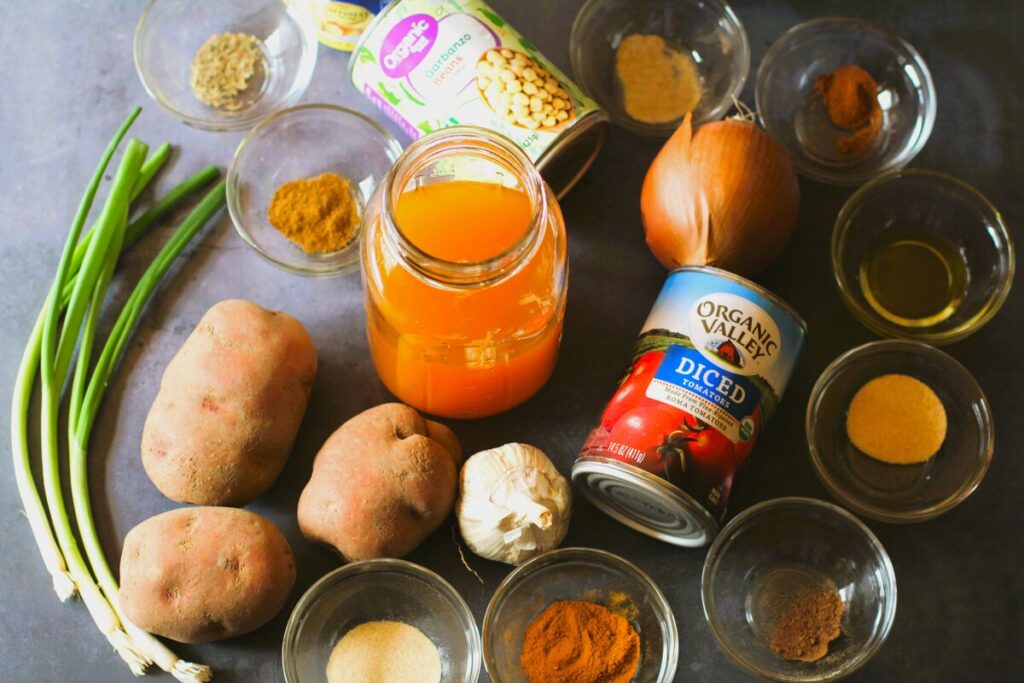
Ingredients in this vegan potato curry recipe
This recipe requires quite a few spices, but don’t let it intimidate you. There are options listed if you don’t have all of the spices on hand.
You can find the full recipe card, including ingredient quantities, full step-by-step instructions, and nutritional information below.
- Potatoes: They are the stars of the show! You can use baby potatoes, red potatoes, gold potatoes, or russet potatoes. I love using Yukon gold since it adds creaminess to this curry. You could also use sweet potatoes as a yummy alternative. Be sure to chop them into about 1″ cubes. It will help keep the cooking time down and having them around the same size as the chickpeas is good.
- Chickpeas: Also known as garbanzo beans. These not only add a nice texture, but they boost the amount of protein in this vegan curry recipe. Be sure to drain and rinse them.
- Diced tomatoes: Be sure to add the juice from the diced tomatoes. Alternatively, you can use crushed tomatoes as well.
- Vegetable broth: Instead of water, vegetable stock gives this curry extra flavor.
- Vegetable oil: I used one tablespoon of olive oil to saute the onion and garlic, but you can use coconut oil, veggie stock, or a little water if you want to omit it.
- Onion and onion powder: Diced onion and onion powder adds delicious savory flavor. You can use yellow onion, white onion, or even red onion.
- Garlic cloves and garlic powder: When you’re eating plant-based meals you want to layer the flavors, so I use both fresh and dried herbs.
- Seasonings: Like any good curry this recipe has quite a few different spices. You can find most, if not all both them at the grocery store. Besides onion and garlic powder this spicy vegan potato curry has curry powder, ground cumin, garam masala, thyme, coriander, smoked paprika, nutmeg, black pepper, and cayenne pepper. You can omit the cayenne if you don’t like a lot of heat in your curry.
- Green onion, fresh parsley, or fresh cilantro – for added color and freshness.
PRO -TIP: You don’t have to have all of these spices, but they are great additions. However, the most important ones are curry powder, cumin powder, and smoked paprika.
Healthy Habits Jumpstart
The Healthy Habits Jumpstart: 5-Day Weight Loss Plan will take you from where you are to where you want to be—on your way to living your healthiest life.
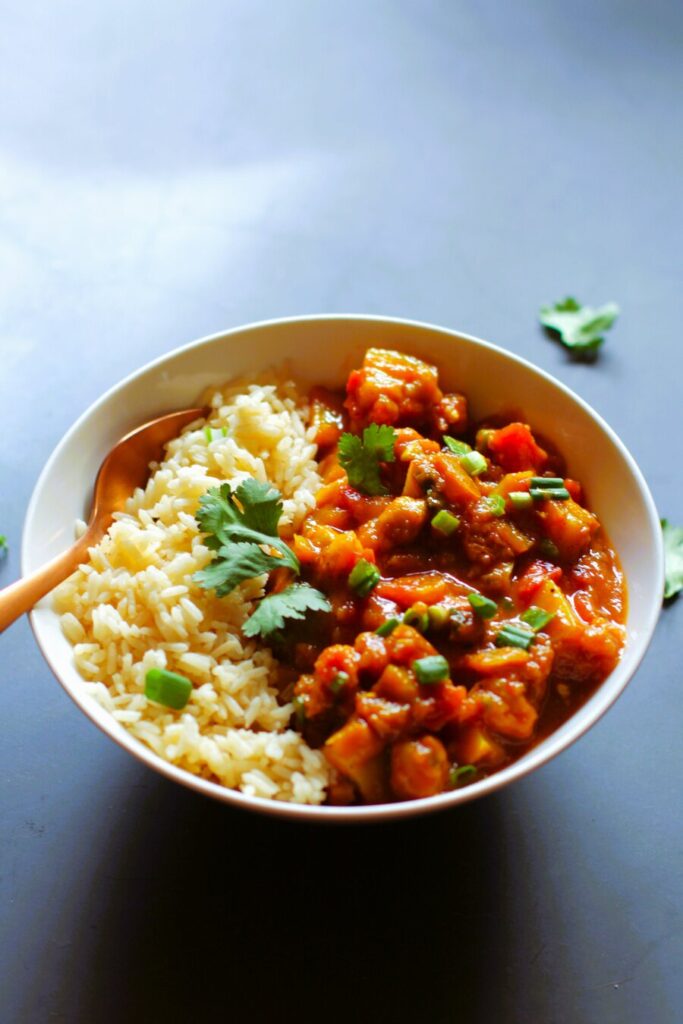
Instructions for making the vegan potato curry recipe in the instant pot
This vegetarian curry recipe is easy to make follow these step-by-step directions.
Step 1 – Saute
Set your Instant Pot to Saute. Once hot, add the tablespoon of oil or a little vegetable broth and saute the onions for about 2-3 minutes or until translucent. Add the minced garlic and spice mix. Cook for one minute longer. Next, press the Keep Warm/Cancel button.
To rinse the rice, place it in a large mixing bowl and cover it with cold water. Using your hand, gently swirl the rice. Pour off the water and repeat this process several times, or until the water runs somewhat clear.
Step 2 – Add Ingredients
Add the potatoes and toss to combine with the spices. Next, add broth and scrape the bottom of the pot to deglaze it. Make sure nothing is stuck on the bottom. Add the rest of the ingredients and stir it.
Step 3 – Cook on high pressure
Place the cover on and move the steam release valve to the sealing position. Set the Instant Pot to cook on high pressure/manual for 4 minutes It should take about 7-10 minutes to pressurize before the 4 minutes will start counting down.
Step 4 – Natural Pressure Release
When the cooking time is over, allow the Instant Pot to release pressure naturally for five minutes. DO NOT SKIP this step. The simple potato curry is continuing to cook. Then, press the cancel button and carefully release any remaining steam by turning the steam release valve to the venting position and doing a quick pressure release. Once the pin drops down, remove the lid.
Step 5 – Thicken curry
This step is optional. You can mash some of the potatoes with a potato masher to thicken the curry.
Another option is to mix 2 tablespoons of cornstarch or arrowroot powder with an equal amount of cold water to create a slurry. Stir the slurry into the curry and press the Saute button. Saute for 2 minutes while stirring to thicken.
Step 6 – Garnish & Serve
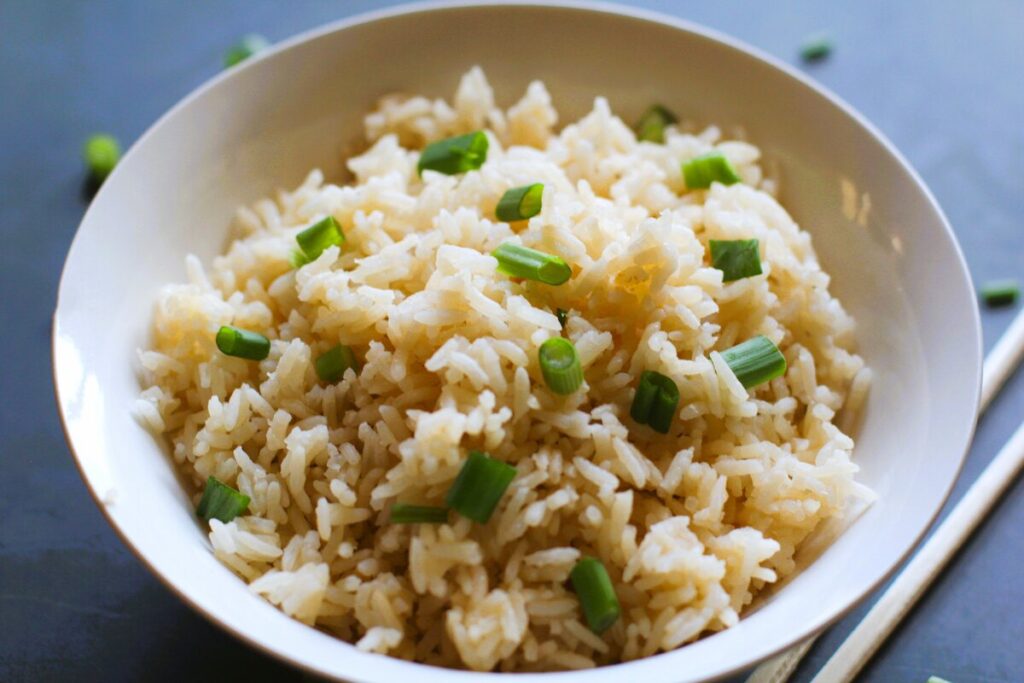
Add chopped green onion, parsley, or cilantro. You can give it a squeeze of fresh lime juice or lemon juice and serve it over this Instant Pot Long Grain Rice Recipe.
Recipe
If you like this recipe remember to leave a 5 star rating and let me know how it went in the below comments, I love hearing from you! You can also FOLLOW ME on FACEBOOK, INSTAGRAM, and PINTEREST to see all my delicious recipes.
Incredible Vegan Potato Curry Recipe (Instant Pot)
Ingredients
- 3-4 medium potatoes, cut into 1-inch cubes
- 2 cups vegetable broth
- 1 15.5 oz can chickpeas drained and rinsed
- 1 14.5 oz can diced tomatoes keep the juice
- 1 medium onion, diced
- 2 cloves garlic, minced
- 1 Tbsp vegetable oil
Spice Mix
- 1 1/2 Tbsp curry powder
- 1 Tbsp garlic powder
- 1 Tbsp onion powder
- 1 tsp cumin powder
- 1 tsp garam masala
- 1 tsp ground coriander
- 1 tsp smoked paprika
- 1/2 tsp thyme
- 1/2 tsp nutmeg
- 1/2 tsp cayenne or to taste
- 1 pinch black pepper
Garnish
- 3 green onions, sliced
- 2 Tbsp fresh parsley, chopped
- 2 Tbsp fresh cilantro, chopped
- 1/2 lime, squeezed
Instructions
- Set your Instant Pot to Saute. Once hot, add the tablespoon of oil or a little vegetable broth and saute the onions for about 2-3 minutes or until translucent. Add the minced garlic and spice mix. Cook for one minute longer. Next, press the Keep Warm/Cancel button.
- Add the potatoes and toss to combine with the spices. Next, add broth and scrape the bottom of the pot to deglaze it. Make sure nothing is stuck on the bottom. Add the rest of the ingredients and stir it.
- Place the cover on and move the steam release valve to the sealing position. Set the Instant Pot to cook on high pressure/manual for 4 minutes It should take about 7-10 minutes to pressurize before the 4 minutes will start counting down.
- When the cooking time is over, allow the Instant Pot to release pressure naturally for five minutes. DO NOT SKIP this step. The simple potato curry is continuing to cook. Then, press the cancel button and carefully release any remaining steam by turning the steam release valve to the venting position and doing a quick pressure release. Once the pin drops down, remove the lid.
- This step is optional. You can mash some of the potatoes with a potato masher to thicken the curry.Another option is to mix 2 tablespoons of cornstarch or arrowroot powder with an equal amount of cold water to create a slurry. Stir the slurry into the curry and press the Saute button. Saute for 2 minutes while stirring to thicken.
- Add chopped green onion, parsley, or cilantro. You can give it a squeeze of fresh lime juice or lemon juice and serve it over this Instant Pot Long Grain Rice Recipe.
Notes
Nutrition
What to serve with curry
Variations/Substitutions
Here are a few ideas to add even more flavor :
- Coconut Chickpea Potato Curry: Add full-fat coconut milk or light coconut milk to the curry sauce for a creamy curry. You can also incorporate toasted coconut flakes or coconut cream for additional flavor and texture for your taste buds.
- Spinach and Chickpea Potato Curry: Include fresh or frozen spinach to create a spinach curry and add extra nutrients and color. Spinach pairs well with potatoes and chickpeas and adds a vibrant green hue to the dish.
- Vegetable Chickpea Potato Curry: Add additional vegetables such as carrot, bell pepper, sweet peas, green beans, mushrooms, or cauliflower alongside the potatoes. This adds depth of flavor and nutrition to this simple recipe.
Healthy Habits Jumpstart
The Healthy Habits Jumpstart: 5-Day Weight Loss Plan will take you from where you are to where you want to be—on your way to living your healthiest life.
FAQ’s
How many carbs in curry?
The number of carbohydrates in a curry dish can vary widely depending on the specific ingredients and recipe used. However, in a typical serving of curry, which includes a sauce made from tomatoes or coconut milk, along with various vegetables, legumes, and possibly rice or other grains, you might find anywhere from 20 to 50 grams of carbohydrates per serving.
Keep in mind that the actual carbohydrate content of your curry will depend on the specific quantities of each ingredient used and how the dish is prepared.
This vegan potato curry recipe has 61 grams of carbohydrates and 14 grams of fiber.
Is Curry vegan?
Not necessarily. The term “curry” itself refers to a wide range of dishes that originate from various cuisines, including Indian, Thai, and Japanese, among others. While many curry dishes are inherently vegan it ultimately depends on the ingredients and recipe used.
Some recipes may include meat, dairy, or other non-vegan ingredients like fish sauce. Therefore, if you’re following a vegan diet, it’s essential to check the ingredients and inquire about the preparation method when ordering or making curry dishes to ensure they align with your dietary preferences.
The Plant-Based Starter Kit
The Starter Kit for Plant-Based Diet includes all the resources you need to reclaim your health today.
How long does curry last in the fridge?
The shelf life of curry in the fridge can vary depending on the ingredients used, how it’s stored, and other factors. In general, properly stored curry can last for 3 to 5 days in the refrigerator. Here are some tips to help maximize the shelf life of curry:
- Cooling: Allow the curry to cool down to room temperature before transferring it to the refrigerator. Placing hot curry directly into the fridge can raise the temperature inside and promote bacterial growth.
- Storage Container: Store the curry in an airtight container to prevent moisture loss and to keep out other food odors. Glass or BPA-free plastic containers with tight-fitting lids are ideal for storing curry.
- Labeling: Consider labeling the container with the date the curry was prepared to help you keep track of its freshness.
- Refrigeration: Place the curry in the refrigerator as soon as possible after it has cooled down.
- Reheating: When reheating leftover curry, make sure it reaches an internal temperature of at least 165°F (74°C) to ensure that any potential bacteria are killed off.
- Visual and Smell Check: Before consuming leftover curry, inspect it for any signs of spoilage such as mold growth, off odors, or changes in texture. If the curry appears or smells off, it’s best to discard it to avoid foodborne illness.
Following these guidelines can help prolong the shelf life of curry in the fridge and ensure that it remains safe to eat for as long as possible. For more info regarding food safety, click here.
Can you freeze curry?
Yes, but the texture of curry may change slightly after freezing and thawing. The vegetables and other ingredients in the curry may soften slightly, and the sauce may become a bit thinner. This is a natural result of the freezing process and may vary depending on the specific ingredients used in the curry.
To help mitigate changes in texture, it’s essential to freeze the curry properly and thaw it gently. Additionally, you can adjust the consistency of the curry when reheating by simmering it for a bit longer to allow excess moisture to evaporate and the flavors to concentrate.
While there may be some slight changes in texture, properly frozen and reheated curry can still be delicious and enjoyable. If you’re concerned about texture changes, you can try freezing small portions of curry to see how it fares and adjust your freezing and reheating methods accordingly.
Here are some steps to freeze curry effectively:
- Cool Down: Allow the curry to cool down to room temperature before freezing. Placing hot curry directly into the freezer can raise the temperature inside and affect the quality of surrounding foods.
- Portioning: Divide the curry into individual portions or meal-sized servings before freezing. This makes it easier to thaw and reheat only the amount you need.
- Storage Containers: Use freezer-safe containers or resealable freezer bags to store the curry. Make sure the containers are airtight to prevent freezer burn and odors from affecting the curry.
- Labeling: Label the containers or bags with the date of freezing and the contents. This helps you keep track of how long the curry has been frozen and makes it easier to identify in the freezer.
- Freezing: Place the curry in the freezer and ensure that the containers are arranged in a single layer to allow for efficient freezing. Once frozen, you can stack the containers to save space.
- Thawing: When ready to eat, thaw the frozen curry in the refrigerator overnight or use the defrost setting on the microwave. Alternatively, you can place the frozen container in a bowl of cold water to speed up the thawing process.
- Reheating: Reheat the thawed curry in a saucepan on the stovetop or in the microwave until it reaches an internal temperature of at least 165°F (74°C). Stir occasionally to ensure even heating.
- Quality Check: Before consuming the thawed curry, inspect it for any signs of spoilage such as off odors, unusual texture, or discoloration. If the curry appears or smells off, it’s best to discard it to avoid foodborne illness.
By following these steps, you can freeze curry successfully and enjoy it at a later time with minimal effort.
More easy vegan recipes you’ll love
How to make curry sauce thicker?
You can mash some of the potatoes with a potato masher to thicken the curry.
Another option is to place 1/2 cup of the curry sauce in a small bowl with 1 teaspoon of cornstarch or arrowroot powder. Stir together to remove any lumps.
There are several ways to thicken curry, depending on your dietary preferences and the ingredients you have on hand. Here are some common methods:
- Cooking Time: Allowing the curry to simmer uncovered for an extended period can help reduce excess liquid and naturally thicken the sauce. Be sure to stir occasionally to prevent sticking and burning. In the Instant Pot, once the curry is cooked, you can remove the lid and cook on Saute until you achieve the desired thickness.
- Cornstarch Slurry: Mix cornstarch or arrowroot powder with an equal amount of cold water to create a slurry. Stir the slurry into the curry during the final stages of cooking and simmer for a few minutes until the sauce thickens.
- Coconut Cream: Adding coconut cream or coconut milk powder can enhance the creaminess of the curry and help thicken the sauce. Be sure to stir well to incorporate the coconut cream evenly.
- Pureed Vegetables: Blend or mash a portion of the cooked vegetables from the curry into a smooth puree using a blender or immersion blender. Stir the puree back into the curry to thicken the sauce naturally.
- Nut Butter: Adding a spoonful of peanut butter, almond butter, or cashew butter can add richness and slight thickness to the curry sauce. Stir well to incorporate the nut butter evenly.
- Plant-Based Yogurt: Stirring in a spoonful of plant-based yogurt can add creaminess and help thicken the curry sauce. Be sure to stir gently to prevent curdling.
Choose the method that best suits your preferences and the ingredients you have available. Adjust the thickness of the curry to your liking by adding more or less thickening agents as needed.
21 Day Weight Loss Solution – Basic
The 21-day plant-based weight loss solution is your kickstart to weight loss. It includes specially curated meal plans, mouth-watering recipes, and the ultimate guide to achieving permanent weight loss.
Pro Tips:
I used a 3 quart Instant Pot for this recipe and you will need to adjust accordingly for your Instant Pot.
I suggest buying a second set of seals for your Instant Pot to use when you cook items that are very fragrant like curry. You simply need to pull out the seal and replace it with another. Then after cooking switch the seal back to use for less fragrant dishes.
If you need a substitute for curry powder check out these 10 substitutions.
Pin this for later

Disclaimer: Please note that I am not a medical professional. The information provided on this blog is based on my personal experiences and research as a vegan recipe enthusiast. While I strive to provide accurate and up-to-date information, it is important to consult with a qualified healthcare professional or a registered dietitian before making any significant changes to your diet, especially if you have any underlying health conditions or concerns. The recipes and tips shared on this blog are meant for general informational purposes and should not be considered a substitute for professional medical advice. Always prioritize your health and well-being by seeking personalized guidance from a qualified healthcare provider.








Love this curry! The spices make the entire dish and it’s perfect for lunch the next day too.
So happy to hear it!